


This article will explain on how to setup emails on the Mac Mail application using a Mac running the software Yosemite.
Step 1)
Select "Preferences" in the Mail menu.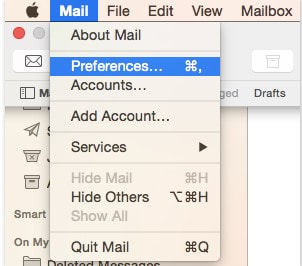
Step 2)
Go to the "Accounts" tab and click on the plus icon.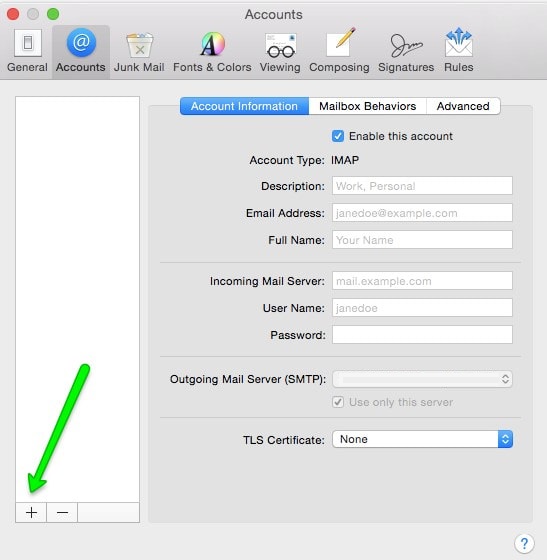
Step 3)
Select "Add Other Mail Account" option, then click continue.
Step 4)
A new window will pop up saying Add a Mail Account, enter your full name, email address and the email account password, once you have that done, please click create.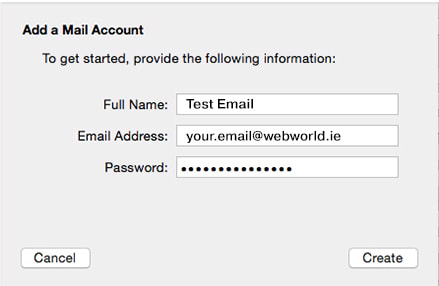
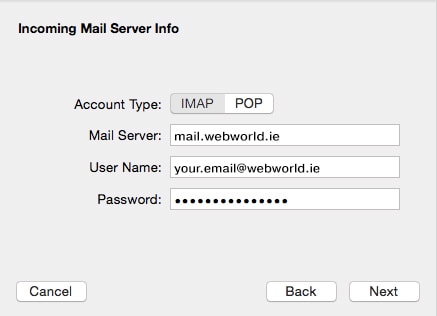
Step 5)
Mac Mail will then automatically try to find settings for you, do not accept the result and click on Next.
A new window will pop up asking you to input Incoming Mail Server info, select POP or IMAP depending which one you use, we recommend using IMAP. Then enter your account details below.
You can find these settings in your cPanel when accessing your account details.
Click on next once the settings are inputted.
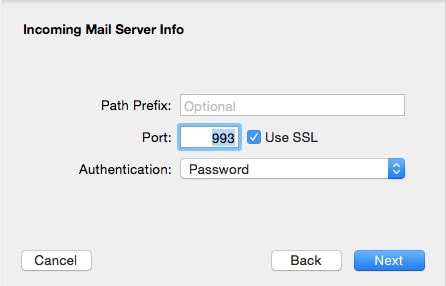
Step 6)
Mac Mail could require more specific settings here.
A window will pop up asking for three things, an IMAP Path Prefix if you chose IMAP above, a Port for the incoming server and an authentication option.
Please set them as below.
Step 7)
A new window will pop up asking for the outgoing mail server settings this time.
Please set them as below and fill the password option using your own password.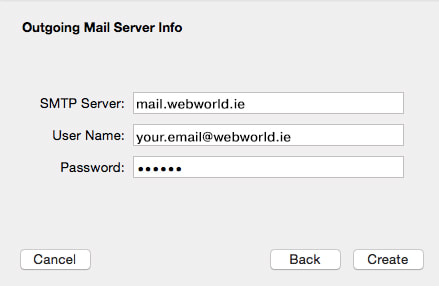
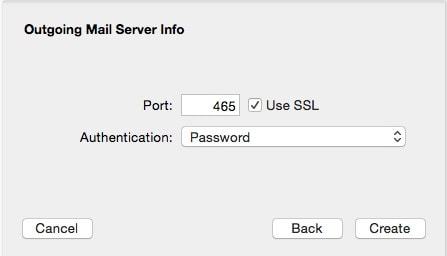
Step 8)
After filling in the settings, another window will pop up asking you to add additional settings.
Fill them in as the picture is stated below.
Step 9)
The last step to have set up is to configure Advanced Server Settings. Go to Accounts and select the account you are setting up. Then select Account Information tab and go to Outgoing Mail Server (SMTP) section, click on Edit SMTP Server List option: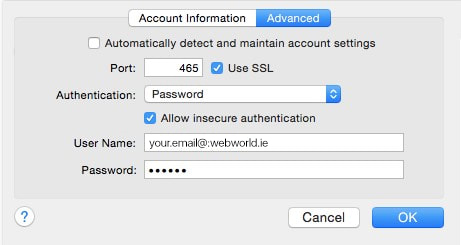
If you do have any further questions about this article please email us at support@webworld.ie and we will be glad to help you out.
